
Why the anchor bolt layout starts before the first hole is drilled
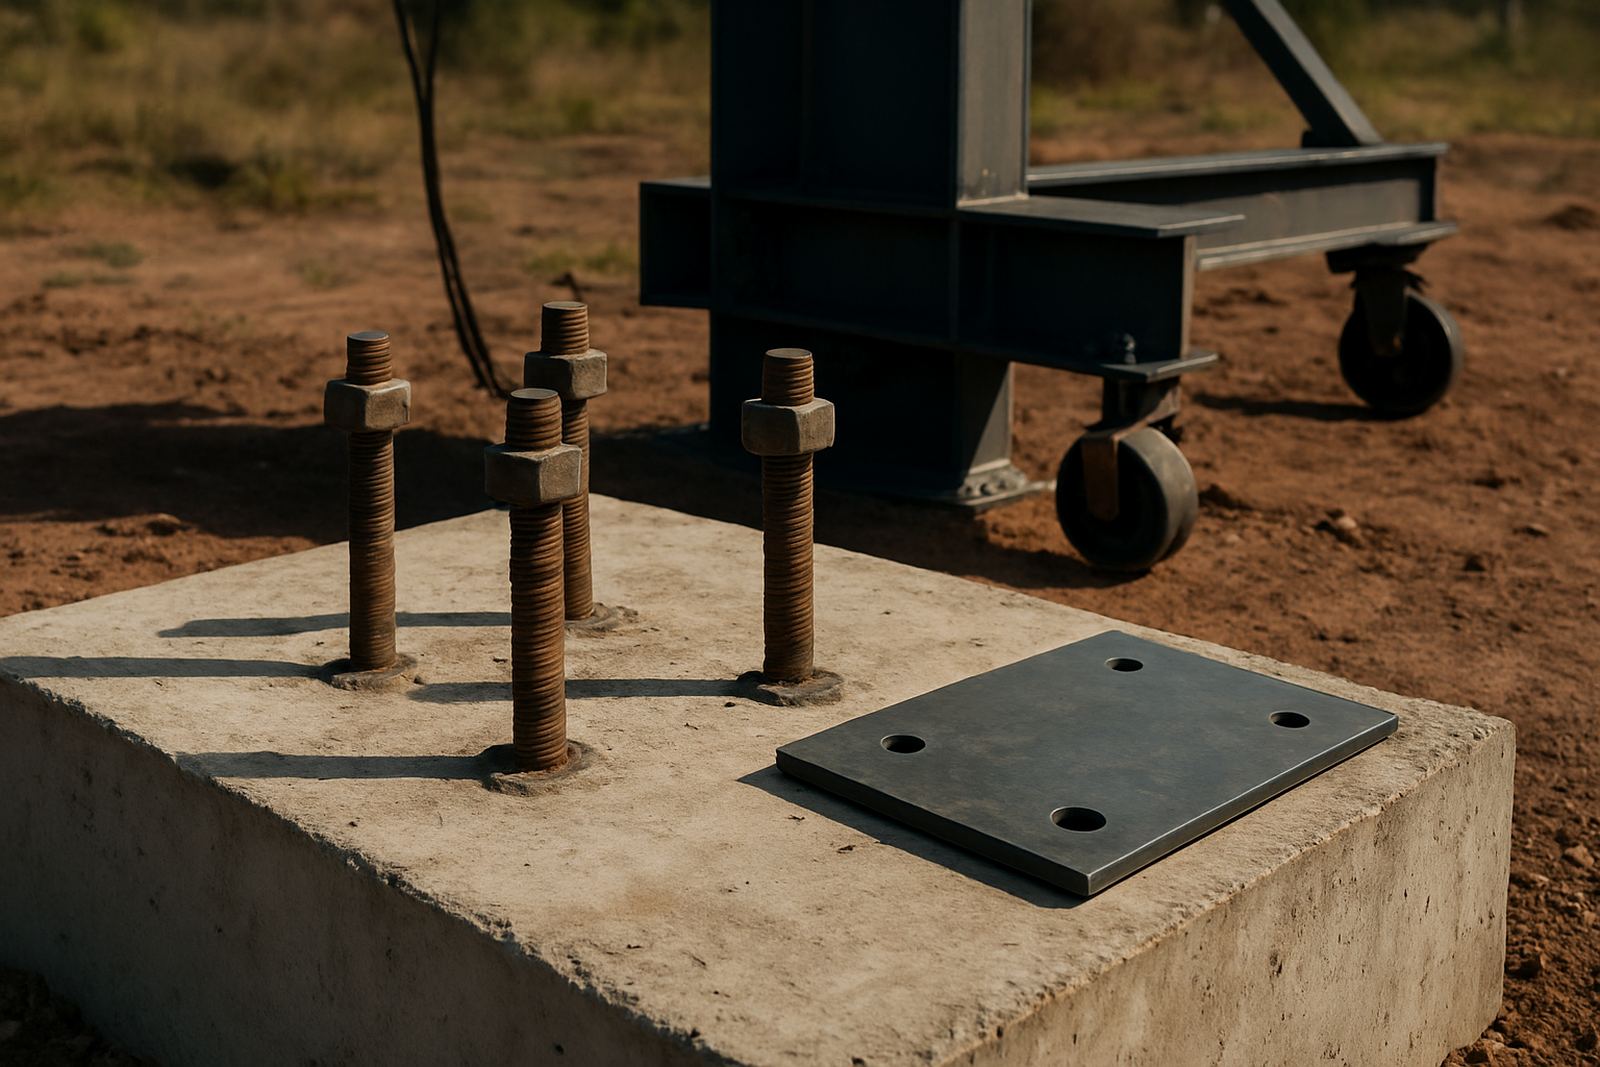
For pylons and monument structures, the bolt pattern is not a small detail. It sets the base geometry for the whole sign, controls how load moves into the footing and gives the fabrication team a fixed point to build from. If the setting-out is off by even a few millimetres, the base plate no longer sits flat and the installer ends up forcing the steel into place, which is never a good idea.
In Gauteng, where many sites sit on busy roads or in developing commercial nodes, there is often pressure to pour foundations early and finalise the sign later. That can work, but only if the bolt template is accurate and protected during the pour. On a recent monument sign job in Modderfontein, the civil team had to coordinate with the sign fabricators and the project engineer so the bolt centres matched the base plate exactly, no guesswork on site.
- Use the approved base plate drawing before concrete is poured
- Check bolt centres, projection height and plate dimensions against the fabrication set-out
- Allow for grout space under the plate so the sign can be levelled properly
Embedment depth is about more than holding power
Anchor bolt embedment is the part that often gets simplified too much. People talk about the visible nuts and washers, but the real performance comes from how deep the bolt is fixed into the footing and what concrete quality surrounds it. For a pylon exposed to wind loading, passing trucks and sometimes vibration from nearby plant or generators, shallow embedment is asking for movement.
Depth, diameter and spacing all work together. A larger bolt with poor embedment may still fail under pull-out or fatigue. A smaller, correctly specified bolt with proper edge distance can perform better than expected. The structural engineer should confirm the loading, but the signage team also needs to understand practical issues like concrete cover, corrosion risk and whether the site is coastal. In Durban for example, the humid air means exposed steel details need extra care, even if the sign itself is inland grade.
- Confirm whether the footing is for a light monument, a tall pylon or a sign with an LED screen
- Check concrete strength and curing time before loading the bolts
- Use galvanised or otherwise protected hardware where moisture exposure is expected
Templates keep the bolt pattern accurate during the pour
A good template is one of the cheapest ways to avoid an expensive mistake. It holds the anchor bolts in position while the foundation is poured and vibrated, so the spacing stays true and the threads remain usable. Without a rigid template, bolts can shift, lean or come up too high on one side, which then affects the plate and the whole base detail.
The template should reflect the final fabrication drawing, not a rough site sketch. For larger pylons, we often see a steel or plywood setting frame prepared in the workshop and checked against the plate before it goes to site. If there is a discrepancy, it must be resolved before concrete is placed. Otherwise the site team spends hours trimming, slotting or re-drilling, and that is time nobody wants to lose on a wet Friday afternoon.
- Mark bolt centres from a single verified datum point
- Keep the template rigid enough to survive concrete vibration
- Protect threaded ends with caps or sleeves during the pour
Base plates, grout and level tolerance make the difference at installation
Once the footing has cured, the bolt pattern still has to work with the base plate and the installation method. The plate should sit level on grout, not be forced to take the shape of an uneven concrete top. When the level is poor, the sign can twist under load and the bolts end up carrying stresses they were never meant to handle. That is where fatigue starts.
For monument signs in shopping areas and mixed-use precincts, a tidy base matters as much as structural strength. Municipal approvals often focus on appearance and roadside safety, but the hidden workmanship at the base is what keeps the sign straight after months of heat, rain and maintenance visits. If access panels, conduits or LED screen cabling are part of the structure, the bolt layout must also leave enough room for installation and later servicing.
Practical site checks before the sign goes up should include:
- Top surface level and grout thickness
- Thread condition and projection above the plate
- Clearance for washers, nuts and any cable entry details
- Final torque sequence after the sign is plumb
Common mistakes that turn a neat drawing into a costly rework
The most common problems are usually simple. Bolt centres are transferred from an old drawing, the footing is poured before the final sign size is confirmed, or the template is removed too early and the bolts move. Sometimes the issue is corrosion protection, especially where water sits around the base or the site is exposed to coastal air. A little rust near the nuts can become a bigger maintenance problem later.
Another frequent mistake is forgetting that a pylon or monument sign is not just a static object. It experiences wind loading, thermal expansion and occasional impact risk from vehicles or service equipment. That means the anchor detail should be treated as part of the structure, not as an afterthought on the construction programme. We have seen projects delayed because the civil works and the signage package were not coordinated from the start, and the bolt pattern ended up needing site correction.
- Do not change the sign size after the footing is cast unless the engineer rechecks the anchor detail
- Do not assume all anchors are interchangeable between suppliers
- Do not leave exposed threads unprotected during storage or on a long site programme
A Modderfontein example: getting a pylon ready for a busy Gauteng site
On a commercial pylon project near Modderfontein, the brief called for a tall structure with illuminated faces and clear roadside visibility. The anchor detail had to suit the wind loading, the footing had to fit within the site boundary and the installation had to work around traffic and live services. That meant early coordination between the survey, structural and fabrication teams before any concrete was placed.
The setting template was checked against the final base plate, the bolt projection was verified and the grout allowance was allowed for in the foundation height. Because the site was active during the day, the rigging sequence was planned for an early morning lift when the area was quieter. That kind of preparation saves time and avoids the all too common situation where a sign arrives on site and the bolts are 12 mm out, which is enough to stop the whole install.
For developers and municipalities, this is the practical lesson: the anchor bolts are not just hardware. They are the reference point for fabrication, lifting, plumb alignment and long-term maintenance. When the detail is right, the rest of the project goes faster and the sign is easier to keep in service.